Sunday 30 October 2011

Almond & Garlic Kale with Sauté Potatoes & Poached Egg


I’m liking kale at the moment (and as a bonus it’s ridiculously nutritious and healthy) and still having a fair quantity of it further to my last vegbox delivery I decided to try a kale based main rather than sidelining it to a mere accompaniment. If you want to have a meat based main however you could have this as a side and leave out the poached egg, and even the potatoes if you like.

I like spice and so I chopped the birdseye chilli whole. If your preference is for less heat, do make sure you de-vein and seed it before chopping (and don’t forget to scrub your hands after!), or in fact just use a milder chili.

This, I think, has an excellent blend of textures and tastes, particularly with the richness of the egg yolk cutting through the ferrous kale.
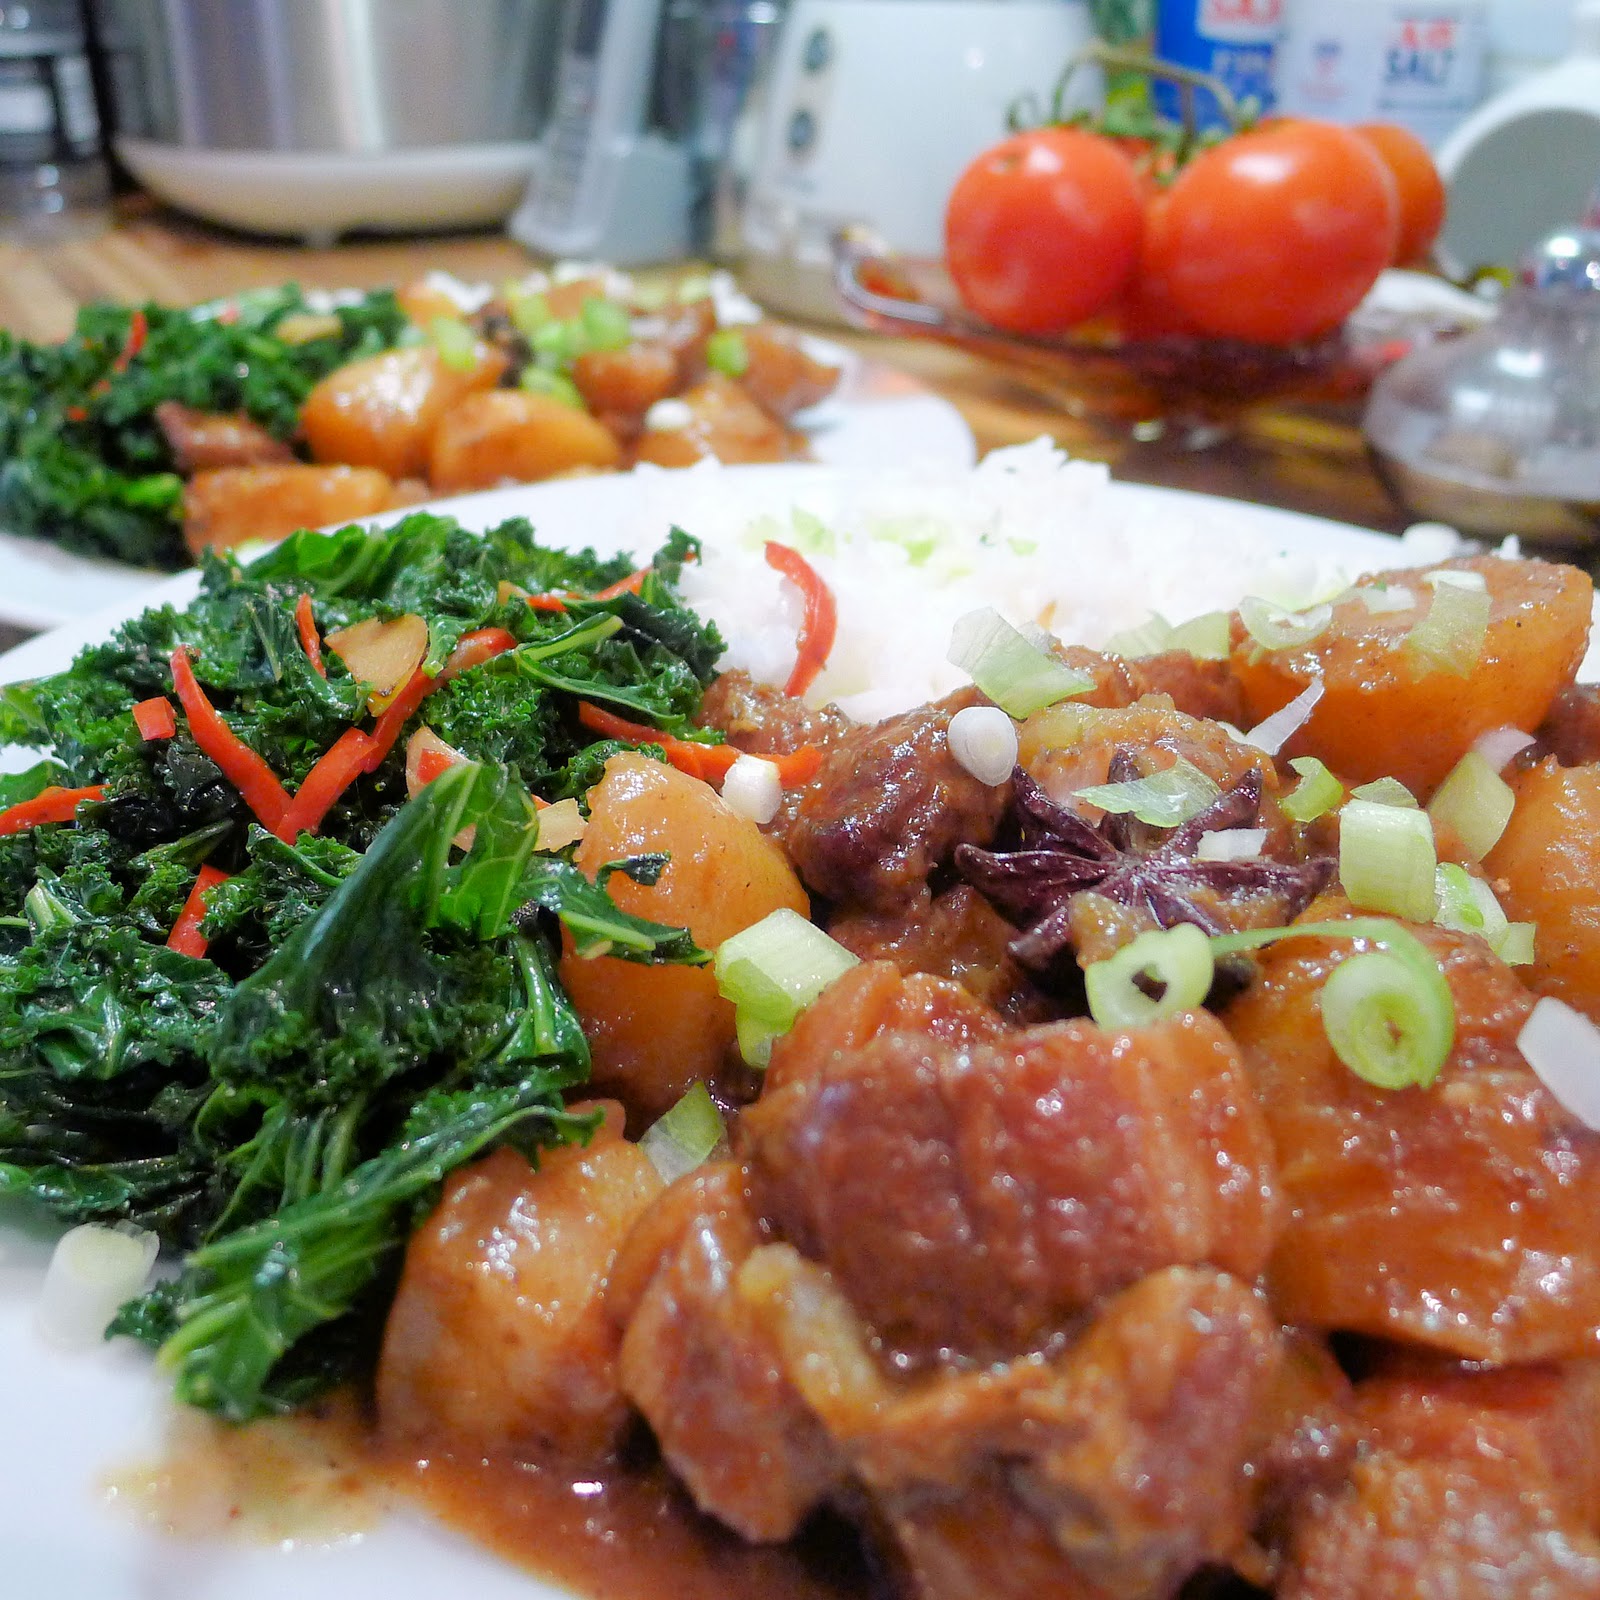

Almond & g
arlic &  kale with sauté potatoes & poached egg
Serves 1 as a main


A few glugs of olive oil
1 large garlic clove, finely sliced
10g almonds nibs, roughly chopped
5 or so large handfuls of roughly chopped curly kale (tough stalks & centre ribs discarded)
1 birds eye chilli, finely chopped
150g potato, scrubbed, cut into 4 chunks
2 spring onions, finely chopped
splash of light soy sauce
splash of toasted sesame oil
1 egg
smoked paprika


Bring a large pan of salted water to the boil then parboil the potato chunks for about 7 minutes.

While the potatoes are cooking, in a large dry frying or sauté pan (you’ll use this to sauté the potatoes later) toast the almond nibs until lightly browned then set aside.


Let the potato chunks cool slightly then slice into ½ cm slices and gently fry with a glug of olive oil over a medium heat in the frying pan until browned all over.

Meanwhile add a good splash of oil to a wok over a high heat. Throw in the garlic slices and chilli and stirfry until the garlic is softened and starting to colour (only about 10 seconds). Lower the heat then add the kale and spring onions. Stir until well mixed and cook for about 8 minutes, adding a splash of water if needed to help cook the kale and stop it sticking.

Halfway through the kale’s cooking time poach an egg for about 4 minutes (I use the same water used to parboil the potatoes).

When the kale is softened and vivid green stir in the potato and almonds and a small splash each of soy and sesame oil. Stir through then turn onto a plate topped with the poached egg and dusted with a little smoked paprika.


Read More »

Saturday 29 October 2011

Braised Pork & Potato with Fermented Beancurd


Apart from my little slip-up on my birthday weekend, I’ve been doing really well with no-red-meat October. A shame then that it suddenly occurred to me over the weekend that with my impending move in less than a month I should get a bit of a move on with emptying the freezer. October has henceforth become then “Red-meat-only-once-a-week-preferably-on-a-Sunday October”. Snappy.

So out came a slab of pork belly for Sunday lunch and rather than a standard roast I decided, surprise surprise to opt for something Chinese. I think the following, adapted from a recipe on Sunflower’s blog  (but with the idea of braising in the oven rather than the on the hob from Hollowlegs) may originate in Hakka cuisine judging by bits and pieces I’ve read on Wikipedia and the like. Admittedly it doesn’t look especially pretty but it is very tasty comfort food and kind of similar to hong shao rou (red braised pork) which I also love with a passion.

Here the meat is meltingly succulent and the potato chunks are tender and infused with the meaty sauce flavour. Frying the potato first apparently makes them nuttier but they also keep their shape better through the braising process. You can of course add them raw if you wish but I suspect that they may disintegrate into the sauce a bit too much. As it was I thought my potatoes a touch too soft (though also ambrosial) and next time with add them about half way through the cooking process.

I had wanted to use the claypot I bought in Chinatown a while ago but as I was cooking the potato and pork in the wok it soon become apparent it wouldn’t all fit so out came my trusty little Le Creuset... this was probably better for my nerves: although the claypot had been soaked in water for 24 hours (which it needs to be before first usage) I still think I would have been a bit anxious about it shattering and leaving me with a braised pork spattered oven. And even worse, no lunch!

I’m not sure that the fermented bean curd I used was the right sort as although it was in a red liquid, the tofu itself wasn’t particularly red. It also wasn’t as pungently smelly as I was expecting. Mind you, as I’ve mentioned previously I have had an horrendous cold recently. 


Braised pork & potato with red fermented beancurd
Serves 3 pretty damn generously


350 - 400g pork belly, cut into chunks
1 tbsp light soy
1 tbsp dark soy
1 tsp five spice powder
large pinch ground white pepper
4 tbsp groundnut oil
700 - 800g potato, peeled and cut into large chunks
1 small shallot, finely chopped
3 cloves garlic, finely chopped
3 thin slices ginger
3 small squares of red fermented beancurd
2 tbsp of the liquid from the fermented beancurd
2 star anise
3 tbsp Shaoxing wine
2 tsp sugar


Preheat the oven to 170C. Mix the belly pork with the soy sauces, five spice and white pepper in a bowl and set aside.


Heat the oil in a wok and fry the potato chunks for about 10 minutes until lightly browned on all sides (you don’t want them cooked through, just browned). Set aside on some kitchen paper and pour off all but 1 tbsp of oil from the wok.

Fry the garlic, shallot and ginger until fragrant then add in the red fermented beancurd, crushing it down into the oil, the beancurd juice, and star anise. Fry for 20 - 30 seconds.


Then add in the pork from the marinade (leave the marinade in the bowl) and stirfry for a further 10 minutes or so until the pork is coloured.


Add the marinade from the bowl, plus the Shaoxing wine and sugar. Stir until bubbling, then mix in the potatoes before pouring it all into a heavy based ovenproof pot (or claypot if it will fit!).

Add about 200ml water or just enough to cover the meat then pop a lid on and put into the oven. Note that if you use a claypot, that must go into a cold oven which you then turn up to 170C.


Cook for about 1.5 hours but check occasionally to make sure that it doesn’t need a little more liquid added.


Serve with curly kale, stirfried with a little garlic and red chilli and some steamed rice.


Read More »

Tuesday 25 October 2011

Sichuan Style Tofu with Aubergine


I had a bad cold at the end of last week and the weekend and when it first hit I wanted comfort food. Spicy comfort food at that.. very spicy. The sort of spicy that gives a cold a cuff round the ear then a hard kick up the arse before flinging it out the door.

I decided, in the end, as I had an aubergine in the fridge, to go for a kind of meatless mapo doufu (tofu) crossed with fish-fragrant aubergine, adding finely chopped shitake mushrooms to replace the meat element of both.

Fish-fragrant aubergine isn’t in fact fishy at all. Fish-fragrant is one of the 23 classic Sichuan flavour combinations with the name actually referring to the method of preparation and ingredients that are associated with traditional Sichuan fish cookery resulting in spicy, sour, salty, and sweet flavors all combined in the one dish.

Mapo Doufu is also known as pock-marked Mother Chen’s beancurd. The story goes that a pock marked old woman (ma = person disfigured by pockmarks and po = old woman), possibly the widow of a Qing dynasty restauranteur, used to prepare this dish for passing traders. Mapo doufu is powerfully spicy with both conventional "heat" and the characteristic "mala" (numbing spiciness) of Sichuan cuisine that comes from the Sichuan peppercorns.

I salted my aubergine for about 30 minutes before cutting into batons, purely because it wasn’t superfresh and I thought may be a little bitter. It ‘s usual to deep fry the aubergine but as I’m trying to eat relatively healthily (ahem) at the moment I stirfried it in a little oil instead until it was all well browned.

The Sichuan chillis and peppercorns should be dry-fried together in a small pan over medium heat until fragrant before grinding using a pestle & mortar. Take care not to burn them though.


The following is predominantly inspired by the recipes for the two dishes mentioned above, found in my trusty standby Fuchsia Dunlop’s Sichuan Cookery, and also a little by a recipe seen in a Ching He Huang book.


Sichuan Style Beancurd with Aubergine
Serves 2


2 tbsp groundnut oil
1 aubergine, sliced into 2cm x 4cm batons
3-4 dried shitake mushrooms, rehydrated & finely chopped (soaking water reserved)
2 garlic cloves, finely chopped
2.5cm piece fresh ginger, finely chopped
2 Sichuan chillies lightly dry fried then crushed
¼ tsp Sichuan peppercorns, lightly dry fried then crushed
2 tbsp hot chilli bean paste, (or to taste)
1 tbsp fermented black beans
250ml vegetable stock
400g firm tofu, cut into 1.5cm squares
2 tbsp light soy sauce
1 tbsp black rice vinegar
1 tsp palm (or brown) sugar
1 tbsp potato flour mixed with 2 tbsp water
2 spring onions, finely chopped


Heat a wok over a high heat and add half the oil. Add the aubergine and stir-fry for about 8 minutes until browned and softened. If necessary you can add a few splashes of water if the wok is getting too dry to stop it sticking and also help it cook.

Set the aubergine aside on a kitchen roll covered plate.

Add the remaining oil to the wok and when it starts to smoke, add the garlic, mushrooms, ginger and the crushed chillies & peppercorns and stir-fry for 20 seconds or so. Add the hot chilli bean paste & fermented black beans, crushing the black beans a little with the back of a wooden spoon. Stir fry all together for about 30 seconds or so until the oil becomes red and it is all very fragrant.

Add the stock and reserved mushroom water, stirring well before adding the aubergine and fresh tofu squares. Bring to a simmer, carefully stirring (you don’t want to break up the tofu). Add the soy sauce, vinegar and sugar. Stir in the spring onions and the potato flour mix and cook to thicken for a few minutes.


Serve in a deep bowl (with plain steamed rice if you like) and if you’re as partial to the tingling heat of Sichuan peppercorns as I am, serve with a little more scattered over.


Read More »

Friday 21 October 2011

Broccoli & Mushroom Stirfry


Red meat free October went slightly awry last Saturday but it was my birthday after all and out for dinner with friends I just couldn’t resist the lamb rump with kidney that was on the menu. Very delicious it was too and I heartily recommend those readers in North London to try out Mosaica in Wood Green’s “cultural quarter” (don’t ask).

Sunday I was back on track though and chose to rustle up a veggie dinner to kick start the new week the way I mean to continue through the rest of the month - fingers crossed anyway!

You could use any vegetables here I guess but I think the combination of iron-rich green veg and meaty mushrooms goes particularly well with the chilli-spiked sauce.


Broccoli & Mushroom Stirfry
Serves 1


100g tenderstem broccoli, cut into florets and the stems into 1½ in pieces, cut in half lengthways
140g mixed mushrooms, sliced - I used crimini and shitake
3 spring onions, sliced on a steep diagonal
½ - 1 fresh red chilli, sliced into slivers
2 cloves garlic, finely sliced
½ inch piece fresh ginger, shredded
small handful greens, shredded
15g cashews
1 tsp sesame oil
1 tsp chilli oil with sediment - I like Lotus brand (see below)
½ tsp five spice powder
2 tbsp light soy sauce
1 tbsp shaoxing wine (or dry sherry)
1 tbsp oyster sauce


Dry fry cashews in a hot wok for a minute, stirring round constantly. Be careful as high oil content of the nuts means they can catch and burn quite easily.

Add the sesame and chilli oils to the hot wok. Throw in the garlic, ginger and chilli and let sizzle for a minute or so until fragrant.

Next add the veg and stir fry for a few minutes.


Add 1 tbsp of the soy, plus 1 tbsp of water and the 5 spice powder then let bubble for a minute or so before adding the cashews, spring onions, another 1 tbsp soy, the wine and oyster sauce.

Keep stirring for another couple of minutes before turning out onto a plate.

I like serving this with a drizzle of extra chilli oil on top.


Read More »

Thursday 20 October 2011

Sambhar - Lentil Curry with Vegetables


Sambhar or sambar is a lentil- based based vegetable curry dish popular in the Southern states of India such as Kerala and Tamil Nadu.

I don’t think what I’ve come up with here is particularly authentic in all honesty (for a start I didn’t use sambhar powder but instead a curry powder labelled “Kinot” in the cupboard - I’ve no idea what’s actually in it!) but what I made does contain what I believe are the sambhar staples of pulse, veg and subtle sourness, courtesy of the tamarind. You could of course use whatever vegetables you fancy, or even better need whatever's in the fridge that needs using up. Of course I opted for my current favourite go-to veg: cauliflower and mooli.

Toasted, ground-to-a-paste coconut can also be added as a variation.

You could serve this with idli or dosa (both sorts of pancakes) to up the authenticity or, as I did, with plain steamed rice.


Sambhar - Lentil Curry with vegetables
Serves 2


1 tsp tamarind concentrate
100g red lentils
1 tsp turmeric powder
2 teaspoons rapeseed oil
salt to taste
5 small dry red chilies (or to taste - I used Piquin which are quite hot & nutty with a hint of citrus)
8 curry leaves
1 small onion, finely chopped
1 garlic clove, finely chopped
½ tsp black mustard seeds
¼ tsp asafoetida
¼ tsp cumin seeds
½ tsp fenugreek seeds
2 tomatoes, cut into eighths then the eigths in half
1-2 tbsp curry powder (or buy / make sambhar powder)
½ head cauliflower cut into smallish florets
100g mooli, peeled and sliced
small handful coriander leaves, chopped

In a large heavy based saucepan bring the lentils and three times their volume of water to the boil with the turmeric and 1 tsp of oil. You should probably wash the lentils but to be honest if you’re using supermarket bought lentils I don’t see there’s a huge reason to. Similarly as the lentils boil you should probably skim off the foam that forms but again, I don’t bother.

Boil the lentils for about 20 minutes - adding more water as necessary but not so much as it gets watery. My lentils pretty much broke down but you can mash them up a bit once soft if necessary.

In the meantime in a separate small frying pan over a medium heat, add the other 1 tsp of oil and when that is hot add the chilies, mustard seeds, cumin seeds, fenugreek and curry leaves. Sauté for 2 minutes before adding the chopped onion & garlic. Saute for a further 5 minutes or so until the onion is lightly browned.

Add the tamarind concentrate with a tablespoon or so of water to mix and let simmer for a minute or two.

Add the contents of the frying pan to the lentils with the asafoetida, tomato, vegetables, curry powder, and a little salt. Allow this to simmer until the veg are tender, somewhere between 15 and 30 minutes.

Serve, with rice, idli or dosa and a little chopped coriander sprinkled over.


Read More »

Wednesday 12 October 2011

Roast Chicken and Celeriac


I used to hate roast dinners, Sunday’s were never a good food day for me. I found them incredibly boring and bland and didn’t like a whole host of vegetables that I now do. Amazingly I didn’t even particularly care for roast potatoes. I know, WTF? My poor mum, she loves a good roast and must have found me a right pain in the arse. And she always cooked the best roast , by far, of anyone I knew, but even so I was never keen.

We grow up though and tastes do change, even though we’d never imagine that to be the case as fussy children. I now really enjoy a good Sunday roast, as a treat - few and far between and simplicity being best, there’s something very comforting about spending a morning prepping for a big early afternoon blowout.

On Sunday then I invited my friend Phil over for lunch. I fancied a chicken, not that there was a huge amount of choice with it being no red meat October and all that and I’d already seen eatlikeagirl’s amazing looking whole roast celeriac which I thought would make a brilliant accompaniment. I then saw a recipe on seriouseats for Ferran Adrià’s roast chicken taken from his new book The Family Meal (inspired by the staff meals eaten at El Bulli). Job done!

I should point out that midway through preparing the chicken I was hugely dubious - the amount of dried herbs seemed ridiculous and I was sure they would overpower the chicken. You may feel the same. But it is really, truly fantastic - hugely flavourful, moist and tender. I’m not sure I will cook chicken any other way now. And Niamh Shield’s salt baked celeriac is another revelation: tender and juicy and a perfect partner to the chicken. I think shoestring or skinny fries are excellent with the chicken, celeriac and gravy - I’d wanted to make these from scratch but my mandolin has disappeared and so a bag of oven skinny fried it had to be.

The following recipes are taken, with minor amendments from the pages linked above.


Niamh Shield’s Slow Roast Celeriac with a Salt Crust
Serves 3-4


1 celeriac, unpeeled but scrubbed & tendrils and “beardy” bits cut off
3 tsp Waitrose 4-spice sea salt
3 tsp Maldon smoke sea salt
1 tbsp olive oil

Using a pestle & mortar, grind together the two different salts then coat the celeriac in a roasting tin with the olive oil and pat the sea salt all over.

Cover with foil and roast for 1 hour on the bottom shelf of the oven for 1 hour at 175C. After 1 hour the chicken will go in and the heat needs to go up to 220C.

10 minutes or so before the end of the total cooking time, remove the foil from the celeriac. Cut into slices and serve with the chicken.


Ferran Adrià's Roast Chicken
Serves 3-4


1.5kg free range chicken
1 tbsp olive oil
1 lemon
¾ tsp salt
10 dried bay leaves
1 ¾ tsp dried rosemary
2 tbsp dried thyme
½ tsp black peppercorns
4 garlic cloves, peel on
3 tablespoons white wine
40 ml (approx 3 tbsp) water

Turn the oven, which would have been on for an hour with the celeriac, up to 220C.

Using a pair of strong kitchen scissors or poultry shears if you have them, snip off the tips of the wings and also the parson's nose of the chicken. Throw these in the roasting pan.

Put the chicken in the roasting pan then season it inside and out with the salt. Rub with oil then finely grate the lemon zest (a microplane grater is perfect for this) over the breast and legs.

Cut the lemon into 8 pieces and place inside of the chicken.

Put the bay leaves, rosemary, thyme, and peppercorns into a spice grinder or small food processor and grind to a fine powder.

Rub this herb mixture over the chicken and push the unpeeled garlic cloves inside the chicken.

Turn the chicken over so it is breast side down and place in the oven for 25 minutes.

After 25 minutes, turn the chicken over and roast it for another 35 minutes, until golden and cooked through.


Remove the chicken and set aside to rest in a warm place. Place the roasting pan over a medium flame on the hob and pour in the wine and the water, loosening any sediment with a wooden spoon. And any juices from the plate the chicken is resting on and bubble it all down to a gravy.

Carve the chicken into pieces and serve with the celeriac and some skinny fries.


Finally, pour the gravy over and enjoy!


Read More »

Monday 10 October 2011

Spiced salmon with roast cauliflower & garlic chilli greens


So I’m being a bit of a dinnerdiary.org plunderer this week and the following is also heavily influenced by a couple of things I have seen there. I’m doing well with my no-meat-October thing.. even if I do say so myself. To the extent that I went out for dinner at the weekend (I had too many martinis to take photos so I shall not, sadly, be posting a review) and steered clear of beef, lamb or pork, having instead tempura soft shell crab (super yum) followed by king prawn yaki soba (ridiculously bland).

More oily fish is clearly on the menu right now, and baby leaf, or spring, greens are extremely versatile. Adding of course cauliflower this is extremely nutritious, simple and delicious. If you’ve never roasted cauliflower before , you really have to try it - it’s seriously the most amazingly tasty thing you can imagine. Even if you don’t like cauliflower I’m confident you will be converted!


Spiced salmon with roast cauliflower & garlic chilli greens
Serves 2


1 tsp coriander seeds
½ tsp cumin seeds
½ tsp fennel seeds
½ tsp chilli powder
Juice of half a lemon
2 salmon fillets
½ head cauliflower
baby leaf greens, finely sliced (about 125g once sliced)
birds eye chiili, deveined and deseeded and sliced into strips
1 clove garlic, thinly sliced
smoked salt (otherwise just sea salt)
freshly ground black pepper
olive oil

Preheat the oven to 200C while you bash the whole spices using a pestle & mortar until ground. Mix in the chilli powder with the ground spices.

Sprinkle the top of the salmon with the lemon juice then coat with the spice mix. Set aside on a lightly greased roasting tray.


Cut the cauliflower into florets and parboil in boiling water for a few minutes. Drain & let steam dry a little before tossing in a little olive oil on a baking tray. Sprinkle with the smoked sea salt and black pepper. Then place in the hot oven on the middle shelf for 15 minutes.

After the cauliflower has been in for 15 mins, turn the heat up to about 230C and put the salmon on the top shelf of the oven for a further 12 minutes.

Meanwhile, sauté the garlic slices with a tsp of olive oil in a sauté or frying pan until softened then throw in the chilli slivers and greens. Stir fry for a couple of minutes then add a tbsp of water, pop a lid on the pan and leave to cook gently for another 5 minutes or so, stirring occasionally.

Serve the salmon with the cauliflower and greens alongside, adding another squeeze of lemon to the salmon.


And as it's been a while since a cat update, look here, temporary harmony in cat world?


Read More »

Saturday 8 October 2011

Chicken with mustard & herb lentils


In case you don’t know, October is “Vegetarian awareness month”, well certainly in America anyway. Now, I had a sort of health MOT type thing recently where I was told that my cholesterol was just outside what it should be. Of course they didn’t tell me if it was good or bad cholesterol (i.e. HDL or LDL - I won’t go into a science lesson) but it did make me think that maybe taking a month off of red meat (and so much cheese) and seeing where I would go from there, may not be such a bad thing.

So.. in honour of that, October shall be, for me “No red meat month”. It started with a salmon broth (as previously posted but this time with added mooli - yum) the other night but as I’d posted that before there didn’t seem much point in doing so again and then continued with the chicken curry, last posted. Hopefully I’ll stick to it.

So onto tonight’s post. As I said in the very first item on here (January I think) I’d been wanting to start blogging for some time. I think what ultimately made me start was a very excellent blog that I used to check religiously by a couple called Kerri & Stephen - http://dinnerdiary.org/ - that I absolutely loved. Sadly it hasn’t been updated for a while but the recipe that follows is very heavily influenced by one I found there. It’s very good.


Chicken with Mustard & Herb Lentils
Serves Two


4 skinless chicken thighs
1 onion, finely diced
1 stick celery, finely diced
1 carrot, finely diced
2 cloves garlic, crushed 
a few large sprigs rosemary, leaves chopped
large handful parsley, chopped
2 bay leaves
freshly ground black pepper
large glass of half white wine, half sherry
150g puy lentils
250ml chicken stock
2 tbsp Dijon mustard
juice of a lemon
extra chopped fresh parsley to serve

Pre-heat the oven to 180 degrees (fan) or 200 if not.

Heat a little olive oil in a heavy casserole over a fairly lowish heat (cast iron pans tend to need a lower heat than saucepans etc) and then add the chicken thighs until browned all over. Remove to a plate.

In the same pan soften the onions, celery and carrot. After about five minutes add the garlic and cook for a couple more minutes. Add the herbs and the black pepper and cook for another minute.


Add the wine/sherry mix, allowing it to bubble for a couple of minutes so that the alcohol burns off.

Thoroughly stir in the lentils then add the chicken stock and mustard and stir again.


Add the chicken to the lentils, squishing in a bit but so they’re not totally covered then put the casserole into the oven for about 35 minutes.


Check the seasoning then serve adding a good squeeze of lemon juice to each plate along with a sprinkling of parsley if you like.


Read More »

Thursday 6 October 2011

Cà ri gà - Vietnamese chicken curry with sweet potato


Indian culinary influences are more pronounced in the South of Vietnam so consequently one finds more curries there and in the centre - that said, the curries do tend to be more stew-like with a soupier sauce than their Indian or Thai counterparts. Another difference is that unlike Indian and Southeast Asian curries, pastes are less likely to be employed and a spice powder blend is used instead. 

You can either make this yourself if so inclined or, as appears to be entirely acceptable, use a store bought Indian curry powder - Madras appears to be that used most frequently but what you do need to ensure is that it is more yellow in colour than red. A little star anise, as used in South Eastern Asian, including Vietnamese cooking quite frequently (but not generally found in Indian powders) could be ground and added to the bought powder if you like.

You’ll need to start this at least an hour and a half before you want to eat to allow for marinating time. You could, if you like use normal potatoes instead of sweet if that is all you have or can get hold of.

This is inspired by that in "Curry" and also a few other recipes I’ve seen online.


Cà ri gà
Serves 2


300g chicken thighs
1½ tbsp (heaped) Vietnamese Cari or failing that Indian curry powder
½ tsp palm sugar
½ tsp salt
1 tbsp rapeseed or groundnut oil + 2 tsp
1 medium sweet potato, peeled & cut into 1in cubes
2 medium garlic cloves, finely chopped
1 banana shallot, diced
400ml can coconut milk
100ml water
1 tsp annatto seed, ground (optional - I just happened to have some after a Mexican ingredient shop)
1 stalk lemongrass, outer leaves removed, then bruised by bashing with a rolling pin
1 large kaffir lime leaf, torn
1 tbsp fish sauce
1 large carrot, peeled and cut diagonally into 1½ - 2in long pieces


First mix together 2 heaped tsp of the curry powder with the sugar and salt in a large bowl. Add the chicken and toss well to coat then marinate for at least one hour.


When ready, heat the oil in a large pot or sauté pan over a moderate heat and brown the sweet potato pieces for about 5 minutes - you want them browned all over but not cooked through. Transfer to a kitchen paper covered plate and set aside.


Add the chicken to the oil in the pan, skin side down and cook for about 10 minutes, turning occasionally to brown all over. Again, remove and set aside on kitchen paper.

While the chicken is browning, in a separate small pan, sauté the annatto seeds in a couple of tsp of oil until they release their red colour and aroma. Remove from the heat and set aside, discarding the seeds.


Add the garlic and shallots to the large pan in which you cooked the chicken and fry for about 5 minutes until softened and lightly coloured. Add the rest of the curry powder, coconut milk, water, annatto infused oil if using, lemongrass, lime leaf, fish sauce and carrots. Mix and cook for about 1 minute before returning the chicken and sweet potato to the pan.

Bring to the boil again then reduce the heat, cover and simmer for a further 20-30 minutes so the chicken is cooked through and the sweet potato and carrots are tender.

Serve with rice, or if feeling authentic, a baguette - a Vietnamese one would be excellent if you can lay your hands on one (or make it yourself!).


Read More »

Monday 3 October 2011

Sichuan Style Beef & Mooli Noodle Soup


I think I’ve made it fairly clear in previous posts that I love Sichuan food. Having a shelf full of Sichuan “store cupboard” ingredients such as douban jiang (chilli bean paste), Shaoxing wine (well, that's not actually from Sichuan but features frequently) and Sichuan peppercorns, I thought I’d try and come up with a soup recipe using these and a new favourite vegetable - mooli.

Mooli, also known as daikon is a large white radish which has a milder, blander flavour than standard small red radishes and is excellent when cooked for soaking up the flavours of the other ingredients, particularly meat.

I think I used some steaks, thinly sliced here but I think it would be excellent with cheaper cuts, cooked for longer. Regardless it is pretty simple, once you have the ingredients, tasty and restorative.


Sichuan style beef & mooli noodle soup
2 servings

265g beef, sliced into slivers
2 tbsp oil
½ inch piece fresh ginger, peeled, cut into “coins” each smashed with the flat side of a knife
1 large garlic clove, coarsely chopped
4 spring onions, finely chopped & half the green parts reserved for garnish
2 tsp chili bean paste (douban jiang)
2 tbsp light soy sauce
¼ tsp salt
1 whole star anise (plus ½ if you happen to have loose bits)
1 tsp palm sugar
½ tsp Sichuan peppercorns, tied in a muslin square
2 tbsp Shaoxing wine
2 baby san marzano tomatoes , each cut into 4 wedges
Freshly ground white pepper
90g noodles
150g mooli, cut into thin rounds
70g shitake mushrooms, thinly sliced
80g ya cai (preserved vegetable - I get mine in a small packet like that on bottom left here)
Chopped fresh coriander 

Bring a large pan of water to boil then add the beef slices. Return the water to a boil then reduce heat & simmer until the beef is just brown. This won’t take long. Drain then rinse the beef to cool and set aside.

Rinse out and dry the pan then add the oil over a medium high heat. Add the ginger and garlic and spring onions and sauté for 1 minute. Add the chili bean paste and stir for about 30 seconds. Splash in the wine then add about 1 litre of very weak beef stock, the soy sauce, salt, star anise, and sugar.  Mix in beef and peppercorns tied in muslin. Finally add the mooli & mushrooms.

Bring the soup to a boil then reduce heat to medium-low and gently simmer for 30 minutes.

After 30 minutes or so add the tomatoes and ya cai and continue to simmer for 15-30 minutes or until the mooli is cooked. Adjust the seasoning, adding more soy sauce, salt or sugar if required plus some freshly ground white pepper.

Meanwhile, cook the noodles according to package directions. Drain well then divide between large soup bowls. Ladle the soup over and garnish with chopped spring onions and coriander. 


Read More »